
The Starter kit for Android Platform Engineering
The bare-bone setup for Android System Building on Ubuntu
Android has been around since November 2007, and today, it’s an impressive 17 years old. With a staggering 3 billion devices running Android, it’s one of the largest and most influential operating systems globally. The evolution has been phenomenal, and with countless new features and smartphones being released by various OEMs, there’s never been a more exciting time to dive into Android platform engineering.
Ready to build your own Android?
This article is your ultimate guide, taking you from the initial machine setup for building AOSP, and IDE configurations, to booting your very first Android system image on a compatible device. Let’s get started!
Table of content
- My experience building Mobile Operating Systems
- Machine setup for building AOSP
- Setting up the build environment
- Compiling the Android OS
- Comparing build times
- Booting your Android build on a Pixel
- Android Studio for Platform (ASfP)
- Alternative setups
- Summary
- References, Citations & Attribution
TLDR
-
Use Ubuntu LTS with performant systems to build Android
-
Build the Android source using Repo, Lunch, and Soong
-
Prepare your test devices for booting Android OS
-
Rely on the Android Studio for Platform (ASfP) for development
My experience building Mobile Operating Systems
I am an engineer with a deep fascination for operating systems that began 14 years ago when I first encountered an Android device. Although my career has primarily focused on third-party app development for major tech companies in Asia and Europe, my journey started with academic pursuits, building the Linux and Android kernel.
Before Android, I spent a considerable time building aftermarket Symbian OS builds for Nokia touch devices around 2009, adding features and apps from newer devices, and optimizing battery and memory usage for older smartphones. It was fascinating!
Building mobile operating systems is really cool. I must say this, it has always given me greater satisfaction as a developer than app development.
I am not a custom ROM developer or a device maintainer on XDA, a question often asked by other developers, Googlers, or ROM maintainers at public conferences. My interest in the Android OS has always been purely academic, and I believe that you – the reader, share this same passion.
Machine setup for building AOSP
A good machine is required for building Android. I mean – you are seriously building an entire OS on a system!
This task requires a robust machine equipped with substantial multi-core processing power, fast storage, ample network bandwidth, and sufficient memory to handle intensive IDE operations. Although there are no defined requirements for building AOSP, Google states its minimum machine requirements. Which are as follows:
System requirements for building Android 15:
| System | Spec | Type | Options |
|---|---|---|---|
| CPU | 72 Core | X86_64 | Intel Xeon |
| Memory | 64 GB | DDR4-5 | Any |
| Storage | 400 GB | NVMe | Any |
| OS | 64bit | LTS | Ubuntu |
While it might seem daunting, we’re not discussing your typical desktop setup here— even high-end gaming rigs would struggle to match the specifications needed for building an operating system. Developing an OS demands significant computing power. Such a robust system is crucial for developer efficiency, reducing build times and accelerating development.
According to Google, a machine of this caliber can complete a full Android build in about 40 minutes. In contrast, a 6-core machine with comparable memory would require a staggering 6 hours to achieve the same task.
While having a 72-core system for building Android sounds appealing, it’s not feasible for most platform engineers. Our goal is to achieve a similar setup and also explore alternatives to physical systems.
Before we proceed to our system setup let’s look at each of the system requirements and understand why each of them is essential.
Multi-core CPUs for build parallelization
Compiling software or packaging software components into binaries benefits greatly from parallelization, a process known as build parallelization. Android’s build system, called “Soong”, supports compiling with multiple jobs, as did previous toolchains.
Given AOSP’s extensive size—approximately 150,000 code files as of 2024—parallelizing builds is essential.
This necessitates powerful multi-core CPUs capable of handling multi-threaded jobs, hence the consideration for systems with high multi-core count. There’s typically a trade-off between machines with higher core counts versus those with higher single-core clock speeds; a balanced CPU will do a decent job of generating Android builds for you.
The machine I use has a 13th Gen Intel i7-13700. It takes about 1h 27min for a full build of Android.
- 16 Physical cores / 24 Threads
- Base: 2.10 Ghz
- Max: 5.10 Ghz
I chose this spec as it was the best I could find. I also think the compile time is still decent enough for a complete build. Depending on your budget for your system, you can look for decent alternatives with higher thread counts.
Fast Memory for IDEs and Code Compilation
Having ample memory enables concurrent Android development and coding. Given its vast scale, opening the AOSP in an IDE could overwhelm a system with limited memory. The Android Open Source Project primarily comprises Java and C++ files, demanding sufficient memory for effective development and compilation.
My system uses 64 GB 5200Mhz DDR5 memory (Corsair Vengeance) with low latency.
I’ve observed memory usage ranging between 12 to 30GB during different tasks when building AOSP. If you add an IDE with complete Android Framework files loaded, memory consumption could rise significantly.
We will set-up an IDE in the later part of this article and use tools for importing the Android Framework packages into the IDE for daily development.
NVMe Storage for fast access
Synchronizing the entire Android source and building a single specified target can occupy up to 500GB of storage. As the system compiles Android using Soong, it simultaneously writes out the compiled files. Opting for fast read-write storage facilitates quick access to source code within your preferred IDE, as well as faster compilation.
Although there is no upper limit on storage specifications, a recommended setup would include a substantial 1-2TB NVMe drive.
We will learn how to setup dedicated out directories on multi-disc / drive environments to avoid bottlenecks on performant systems.
Personally, my system is equipped with 2TB of NVMe storage, 2TB of solid-state drive storage, and an additional 1TB of high-speed SATA storage.
network
At first sync, AOSP is about 200-300GB in size. Consider a decent enough internet connection for fast sync of the source as you will be pulling in new changes while you develop for the platform.
Setting up the build environment
In all practicality consider setting up a 64-bit environment on your machine. Setup your machine with a Long-term support release of Ubuntu. You can download the latest installation images here.
Earlier versions of Android can be compiled on Mac OS. Current-gen Apple devices with Apple Silicon still run into incompatibility issues as many libs used for building AOSP are specifically for X86_64 systems and Apple Silicon uses Arm64.
Syncing the source
Create a dedicated directory for syncing the Android source using the file manager or via mkdir. From our example:
/Projects/AOSP/Setup tools for syncing
Install dependencies, build-essentials and libs on your system for building on Ubuntu
sudo apt-get install git-core gnupg flex bison build-essential zip curl zlib1g-dev libc6-dev-i386 x11proto-core-dev libx11-dev lib32z1-dev libgl1-mesa-dev libxml2-utils xsltproc unzip fontconfigNow, let’s set up the tools for source control. Google uses Repo and Git to manage AOSP sources. AOSP relies completely on Git, while Repo acts as a super-tool for handling Git repositories. Since Android is a large “super-project,” Repo helps sync multiple Git directories. It’s a Python-based tool that wraps around Git to make source management easier.
Setting up Repo
Install repo on your system using apt-get
sudo apt-get install repoInitializing Android repo
Once repo has been setup along with all the build dependencies we can start cloning the source to our machine. Navigate to your project directory and initialize repo via
repo init --partial-clone -b main -u https://android.googlesource.com/platform/manifestSyncing
Sync the repo and start downloading the source to your local directory.
repo sync -j8This will launch 8 sync jobs and start fetching AOSP, you can also use the -c flag to sync the current manifest. Depending on your internet connection and server latencies the sync may take time.
Compiling the Android OS
With the majority of our build setup complete, we can finally proceed to building the system images and compiling the Android OS. In this example, we are building AOSP for the Google Pixel 6A (bluejay).
(Optional) Device binaries or Blobs
Since we are compiling for a physical device we require the device binaries supplied by its manufacturer aka Blobs. We are building for a Google device and Google supplies binaries for most of their devices they can be found here.
Download appropriate binaries for your device matching the tagged build/branch. In case you want to build for an emulator you can skip this step entirely.
Setting up device binaries
To setup the blobs unarchive the downloaded file and place the outputs in the root directory of your project. In this example, we will place them in /Projects/AOSP.
Execute the shell script in your terminal at the root path. This will place all the blobs and extract them correctly in the project. Eg for the Pixel 6A:
sudo extract-google_devices-bluejay.shMake sure you run it in sudo as the script needs permissions to write in certain directories.
Lunch Time
Before we go and grab our favorite snack, let’s setup a fresh build for compilation. By the time you are back, Android should have compiled for your device and we will proceed to booting it on the physical device.
Setup the build environment
Prepare the execution environment with the following command
source build/envsetup.shIdentifying build target
Build targets are like recipes we pass as args to the lunch command line utility to compile the source for a specific target. The format of a build target is a string consisting of the target, release, and variant like target-release-variant.
| Target | Release | Variant |
|---|---|---|
| bluejay | trunk_staging | eng |
A target or product is a device or an emulator that you want to build Android for. Here are some sample targets:
- Cuttlefish emulator:
cf - Pixel 6A:
bluejay - Pixel 8 Pro:
husky - Nexus 5X:
bullhead
Since we are building AOSP for bluejay, we will identify our product as aosp_bluejay. You can look for more supported device codenames in the source.
Release
We will set our release as trunk_staging
Variant
Identify the type of build you want to generate. There are three types of builds:
| Build | Compile time | Performance | Debuggable |
|---|---|---|---|
| eng | Fast | Slow | Yes |
| user | Slow | Fast | No |
| user_debug | Slow | Fast | Yes |
Performance relates to the actual on-device performance of the build. Since it’s our first build, let’s set it to eng as that will provide us with the fastest build. Our recipe target can be now identified as aosp_bluejay-trunk_staging-eng. Don’t worry if you mess it up, the command line utility will throw an error for format errors. Execute the lunch command to set the target.
lunch aosp_bluejay-trunk_staging-engIf set correctly the console should indicate the following output:
============================================
PLATFORM_VERSION_CODENAME=VanillaIceCream
PLATFORM_VERSION=VanillaIceCream
TARGET_PRODUCT=aosp_bluejay
TARGET_BUILD_VARIANT=eng
TARGET_ARCH=arm64
TARGET_ARCH_VARIANT=armv8-2a
TARGET_CPU_VARIANT=cortex-a55
TARGET_2ND_ARCH=arm
TARGET_2ND_ARCH_VARIANT=armv8-a
TARGET_2ND_CPU_VARIANT=generic
HOST_OS=linux
HOST_OS_EXTRA=Linux-6.8.0-35-generic-x86_64-Ubuntu-24.04-LTS
HOST_CROSS_OS=windows
BUILD_ID=MAIN
OUT_DIR=out
============================================Make Android
Let’s compile Android 15, vanillaIceCream. Initiate the build process for the set target with the m command.
m -j24You can configure the -j flag and specify the number of jobs you want to launch. We have specified it as 24 in this example based on the maximum supported thread count of my system.
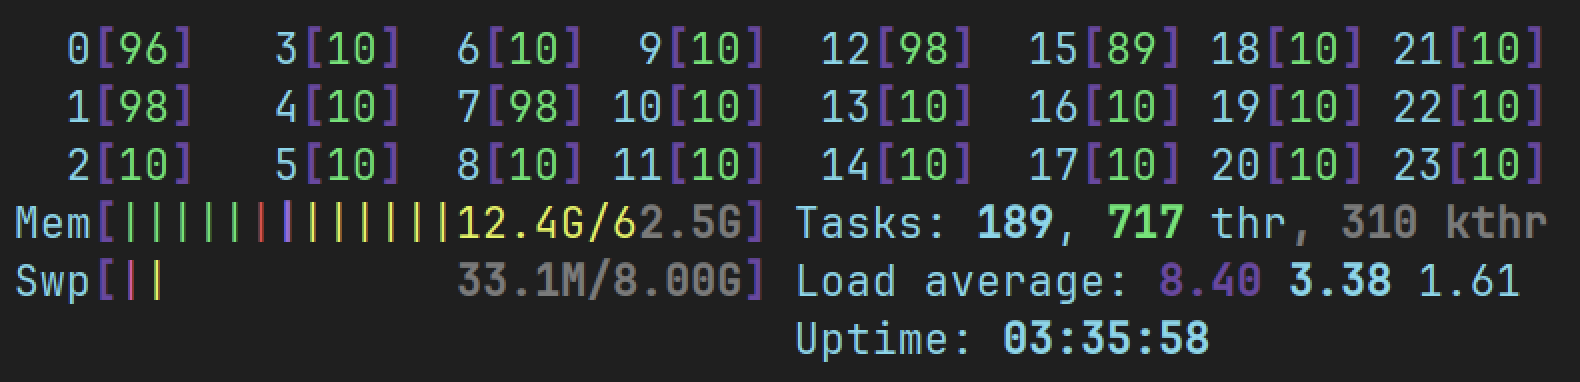
Monitor your system during builds
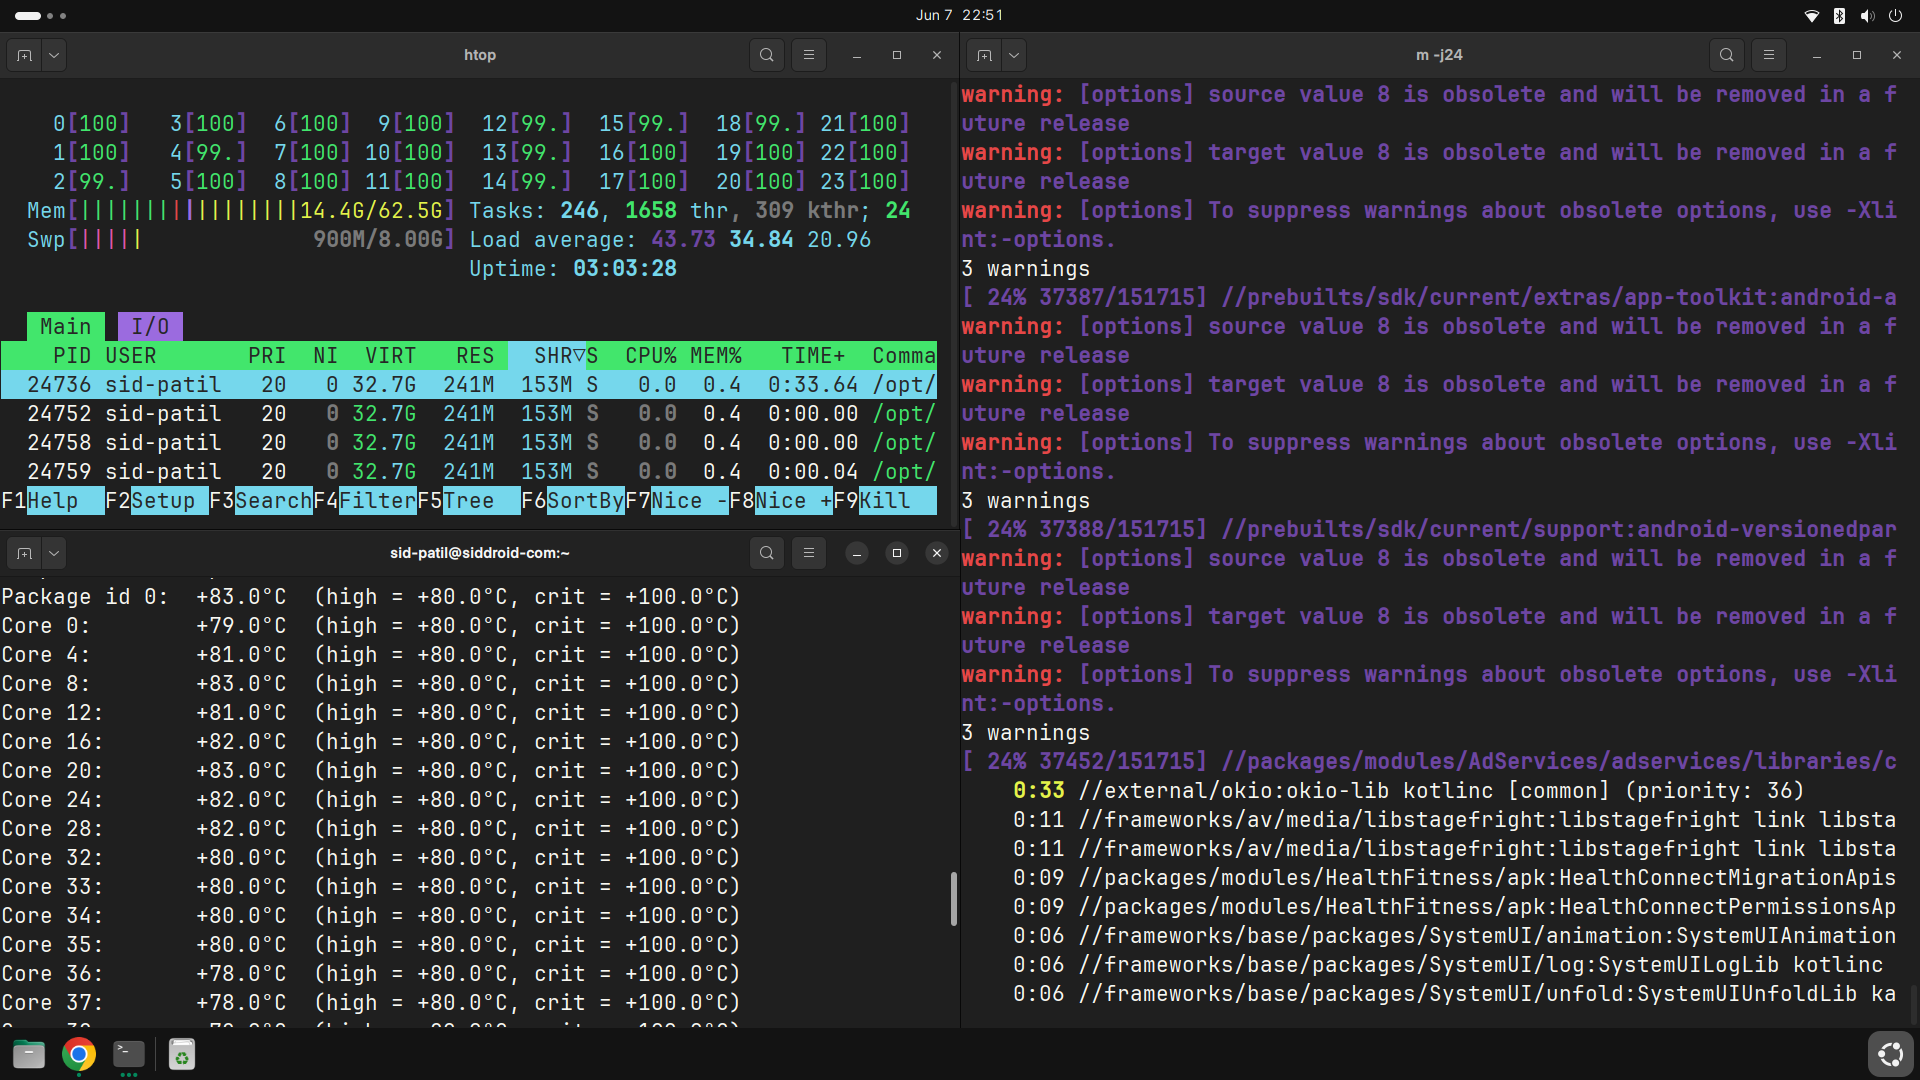
I like to monitor system memory consumption, CPU utilization, and temperatures during Android builds. You can achieve this using htop on Ubuntu. It’s important to pay attention to your CPU temperatures, as they can rise significantly during a full Android build. On my system, CPU temperatures range from 60 to 80 degrees Celsius. These temperatures are quite high and indicate the need for effective cooling solutions. As I continue to enhance my system for daily platform development and experimentation, addressing this cooling requirement will be essential.
Successful Android Build
Upon completion of the build your console output should indicate the following
[100% 44162/44162 0s remaining] Target vbmeta image: out/target/product/bluejay/

#### build completed successfully (16:52 (mm:ss)) ####

siddroid-com% ➜ AOSP
Here in the example output, the generated output resides in the root of the project under the out directory. This is where the final compiled sources for Android will be stored and then used for flashing our physical device. If you are working in a multi-drive environment and would like to specify a separate out directory, you can do so by setting the OUT_DIR environment variable on your system.
export OUT_DIR=YOUR_PATHHaving a dedicated out directory on another physically mounted drive can help speed up builds as it can access the full read-write of the disc. This can also help if your system has multiple storage drives.
Comparing Build Times
Build times can range significantly depending on the number of files you have changed. A full build will take a longer time when you compile, incremental builds are usually fast but can still take proportionate time with the number of files and packages you have changed.
The build system is impressively good at keeping a tab of changes and it will only re-compile packages and classes that you have changed. Here is a small comparison of expected build times for Android 15.
| Build Type | Compile time | Incremental |
|---|---|---|
| eng | 1h 27mins with 24 jobs | No, full build |
| eng | 2-5mins with 24 jobs | Yes, single package changes |
| user | 46mins | Yes, with a previous eng build generated. |
As much as I would like to perform an accurate analysis of Android system builds on multiple systems, these numbers are just to give you an idea of the overall build time expectations. These figures are approximated on my machine with a 16C/24T CPU. They will vary vastly depending on your system configuration.
The Soong build system will notify you of the progression and number of code files being compiled [100% 44162/44162 0s remaining] like so, with an estimated time remaining. Measuring an incremental build can be varied, as you could be compiling incrementally with repo syncs or local code changes.
The figures can be quite high yet daily development usually is not tedious, I have noticed build-time-to-boot in the range of 4 to 5 minutes while developing AOSP.
Booting your Android build on a Pixel
With a complete compilation of the AOSP, we can now proceed to boot it on your physical device or emulator. In our example, we are going to boot the OS on a Google Pixel 6A, the one we built our system images for.
The process is fairly straightforward. This process of installing the Android OS on a device is called “Flashing”.
The term flashing originates from Flash Memory, the non-volatile storage on your device. Named by an employee at Toshiba in the 1980s inspired by the flash of a camera, analogous to the erasure of the NAND in an instant.
You can skip the portion below if you are not flashing the OS on a physical device.
To flash our system image on the device, we require an unlocked device. The steps to unlock a Google Pixel are simple and require the fastboot utility. You can acquire it by installing platform-tools on your system.
sudo apt install adb fastbootThe above will install adb and fastboot command-line utilities on your system. You could alternatively just install the Android SDK on your system and run the binaries from the installation path.
Prepare your device for OEM unlocking. Note that this will erase everything on your device, do create backups for any user data that you may have on the test device. I would recommend investing in a dedicated test device for platform development and not using your daily device.
Navigate to settings, and developer options and check OEM unlocking on the device. Also, enable ADB in the developer options.
Issue the following commands sequentially:
adb reboot bootloaderYour phone will boot into the OEM bootloader, and you can now use fastboot to unlock the device.
fastboot oem unlockThe device should unlock, use the device buttons to say yes and the device should now be ready for daily platform development and experimentation. Proceed to flash our freshly built system images on the device.
Set the variable ANDROID_PRODUCT_OUT, just export the out directory path for your device in your env variables. Do set the whole path to the target output directory.
export ANROID_PRODUCT_OUT=/home/user-name/Projects/AOSP/out/target/product/codenameYou can set the path in your .zshrc as well to avoid setting it daily. Follow this by executing the fastboot flash
fastboot flashall -wIt hardly takes a minute to deploy our build to the actual device via fastboot. The device should self-reboot into the OS. Since we are booting the pure AOSP vanilla Android, you will boot directly into the launcher with no setups required.
Android 15 - AOSP build booting on a Google Pixel 6A
Super! We have a full setup for generating Android system images and testing them on our physical devices. This concludes our first major milestone for building Android and developing the open-source platform.
We can now proceed to learn about how to setup a nice IDE for Android Platform Development.
Android Studio for Platform (ASfP)
Given the vast size of AOSP, any IDE will struggle to keep up with the entire source code. An IDE needs to monitor file changes in your file system as you code and make adjustments. However, it’s unnecessary to monitor all 150,000 files of the Android Open Source Platform. Instead, you only need parts of the project, the generated platform sources, and link them with the IDE to create your applications or make changes to the project.
AOSP still includes helpful tools called IDE-Gen and AIDEGen that simplify developer workflows. But we are not going to use them as they are no longer supported.
In 2024 the IDE of choice to develop for the Android Platform is a custom variant of the Android Studio, called Android Studio for Platform (ASfP).
Proceed to developer.android.com and download the ASfP latest build. The setup is quite simple, download the Debian package and install it with the dpkg utility. Launch the ASfP from the command line with
/opt/android-studio-for-platform/bin/studio.shInitial Setup for ASfP
The initial setup is straightforward. Open the root of your repo directory which is /Projects/AOSP in our example. Set the lunch target as we determined earlier in the lunch input box. Add any modules you specifically want to develop, in this example, I will import the entire AOSP Framework. You will find that the IDE will initiate sync using the Soong build system and start building the module much like Gradle builds for a third-party consumer apps in the regular Android studio.
A framework class opened within ASfP
Now, you can dive into the source files, add new modules and packages, and build Android! Contribute to the OS, experiment with its system, framework, and applications, and unleash your creativity.
Make a change, create a new build, and deploy it on your device to see your modifications in action!
Alternative setups
You may have noticed that I haven’t recommended a laptop for your setup, as high-spec configurations can be quite expensive. However, if portability is important to you, you could opt for a laptop with similar specifications or get a decent one with strong processing capabilities and upgrade it with additional memory and NVMe drives for building the Android platform.
Similarly one could ask – why not just setup the environment on the Cloud?
Yes, you could set everything up on the cloud, where systems can be dynamically configured using tools like Docker. I explored several cloud providers, including Google, Amazon, and Digital Ocean. Despite their massive computing capabilities, building the OS within a reasonable time frame for daily development and learning wasn’t feasible on a server setup.
While a cloud setup is ideal for building Android platform development infrastructure, for daily development, I prefer a local machine and recommend the same to the reader.
In case your inclinations for studying the internals of the Android OS are purely to gain an understanding of the system and not develop it, the Android Superproject is a great web-based tool to navigate around AOSP.
Summary
We’ve embarked on an exciting journey and learned how to:
-
Configure your machine and workflows to build the Android OS locally.
-
Use the custom VCS tool Repo to sync Android sources.
-
Prepare environments to generate system images for development devices.
-
Set up devices with Fastboot to launch your Android builds.
-
Leverage the ASfP Android Studio for Platform development and take your Android OS projects to the next level.
I hope you found this guide both exciting and helpful. Share your thoughts in the comments below, I’m eager to hear from you. Thank you!
References, Citations & Attributions
- Android Developers | Source contains a nice step-by-step guide for building AOSP.
- Android Super Project for studying AOSP on the go.
- Android Studio for Platform for developing the Android OS.